
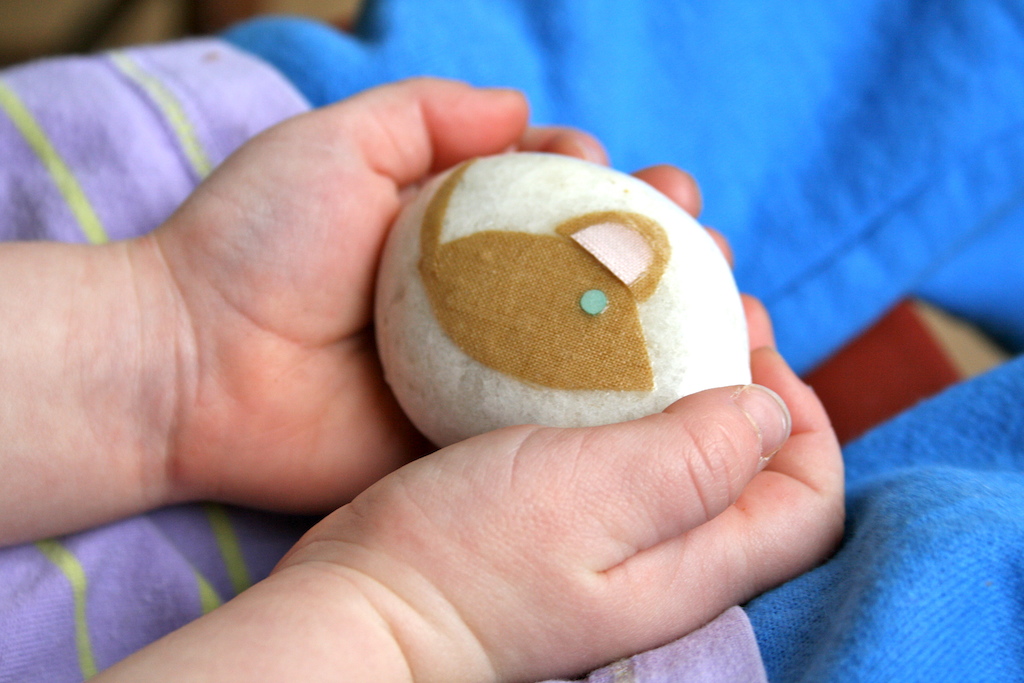
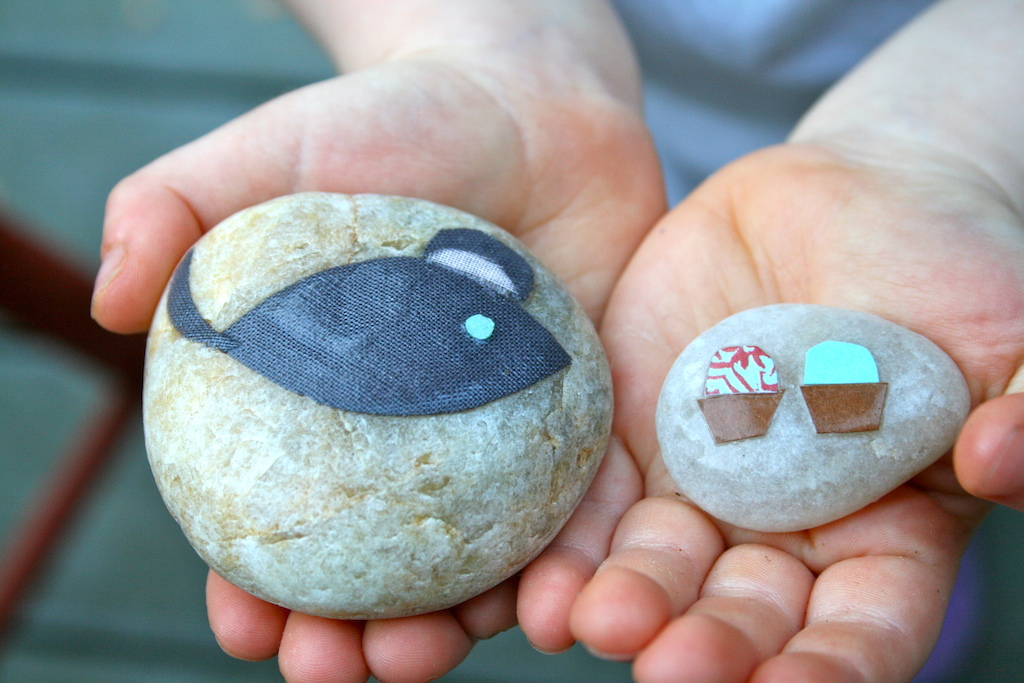
After months and months of drawing pictures of mouse picnics with Chick, I decided that we should make a mouse picnic for her to play with. This project began with peaceful stone gathering and then turned into an excuse for indoor water play since all of the stones needed to be rinsed. The very very end left us covered in glue and feeling eager to see who our little stones would become once dry. Chick chose which shapes and creatures should be at the picnic, and I cut out the shapes and did most of the gluing . This afternoon, she worked on a more abstract set of rocks that are still drying – I’ll post pictures of those soon. I’m realizing that this project doesn’t really have an end; there is always one more little friend or food or burst of color to add to the set. The best part is that I found out my kid can tell a pretty involved mouse story; these little friends have names, back stories, and very specific likes and dislikes. Like, for instance, the cupcakes are definitely dark chocolate.
Here is a little tutorial showing how this passel of mice and company were created.
Materials:
stones of all shapes and sizes
bits of fabric and paper
hole punch
scissors
pencil
Mod Podge
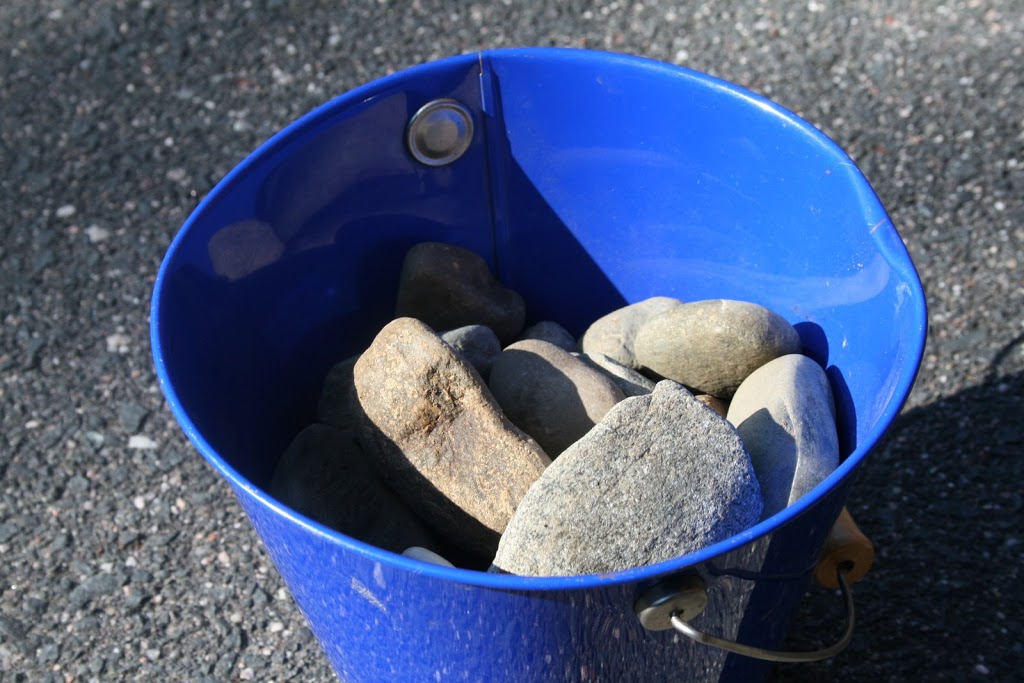
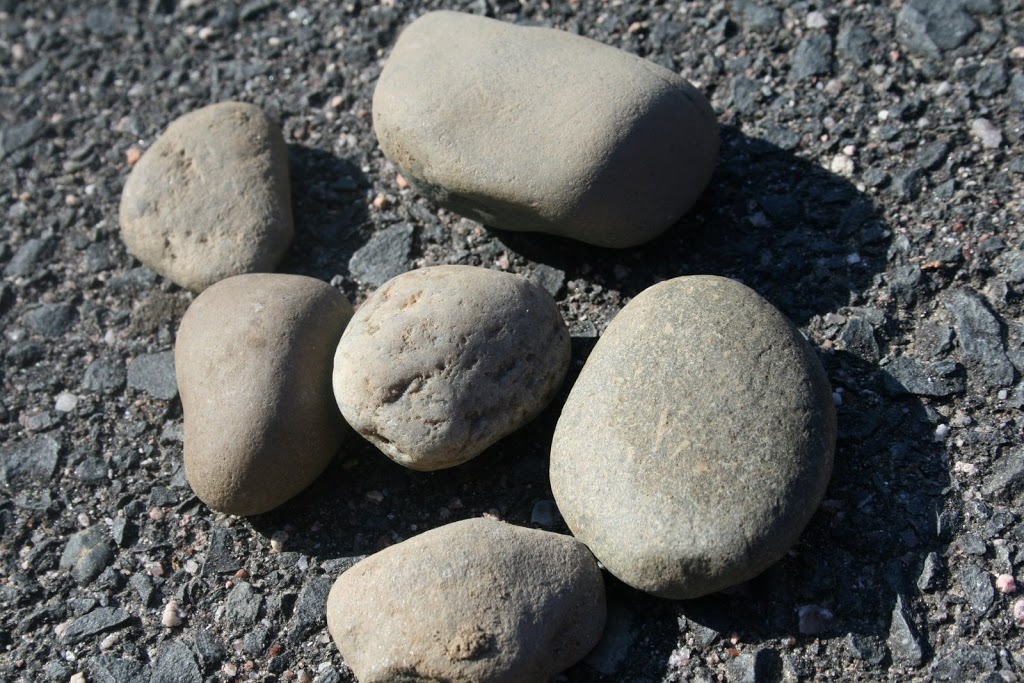
Step 1: Collect stones in a bucket. Try to find different shapes since that will ensure that there are lots of options later on. The smoother the stone, the better.
 Step 2: Dump the stones into the sink, fill the sink with water, and have someone who loves to play in water scrub each one with a brush. Just rinsing the stones is also perfectly fine too. Once all of the stones are rinsed, set them out in the sun to dry.
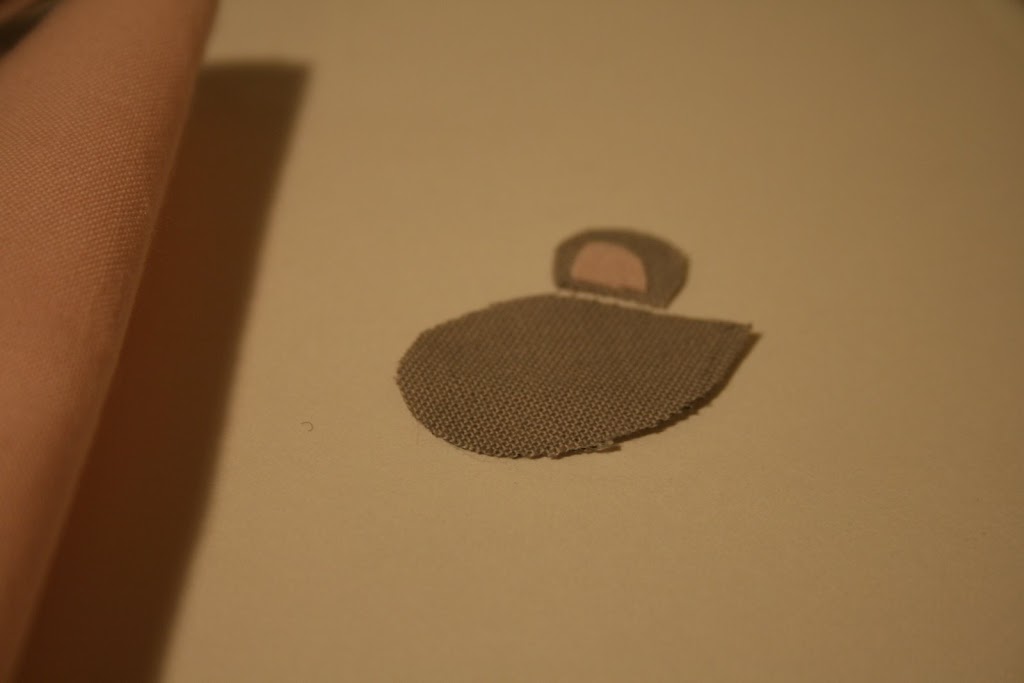
 Step 3: Using a fabric pencil, draw a mouse shape on your favorite gray or tan fabric and cut it out.
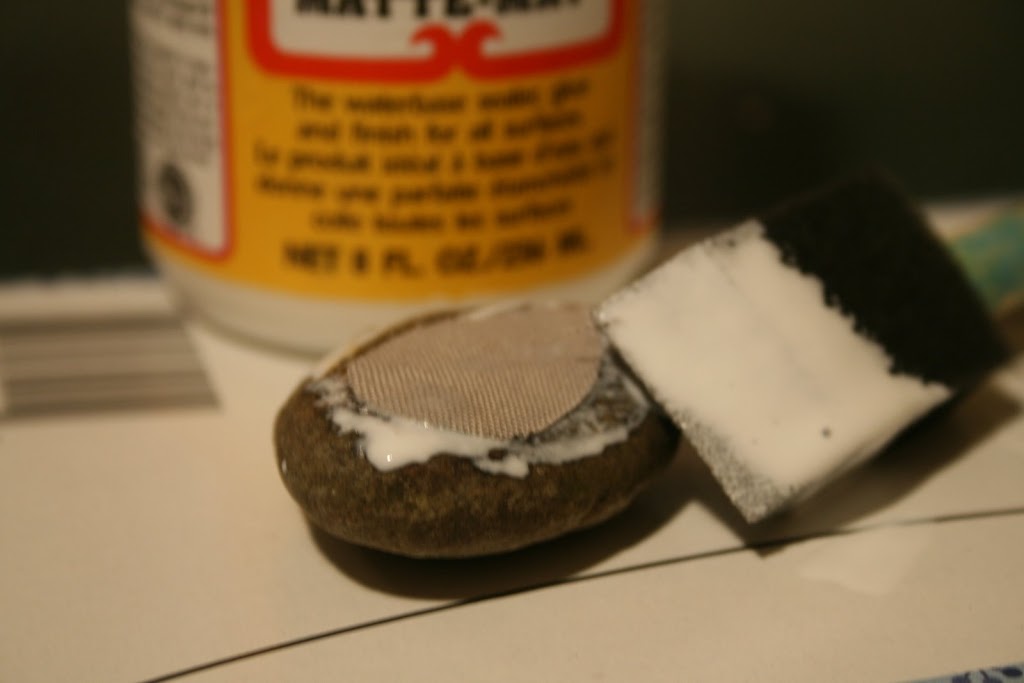
Step 4: Find a stone that seems to work well with your shape, and coat the stone with Mod Podge. Then, put the shape on the stone and put another layer of Mod Podge over it. Use your fingers to rearrange the shape, so that it is positioned just right on the stone.
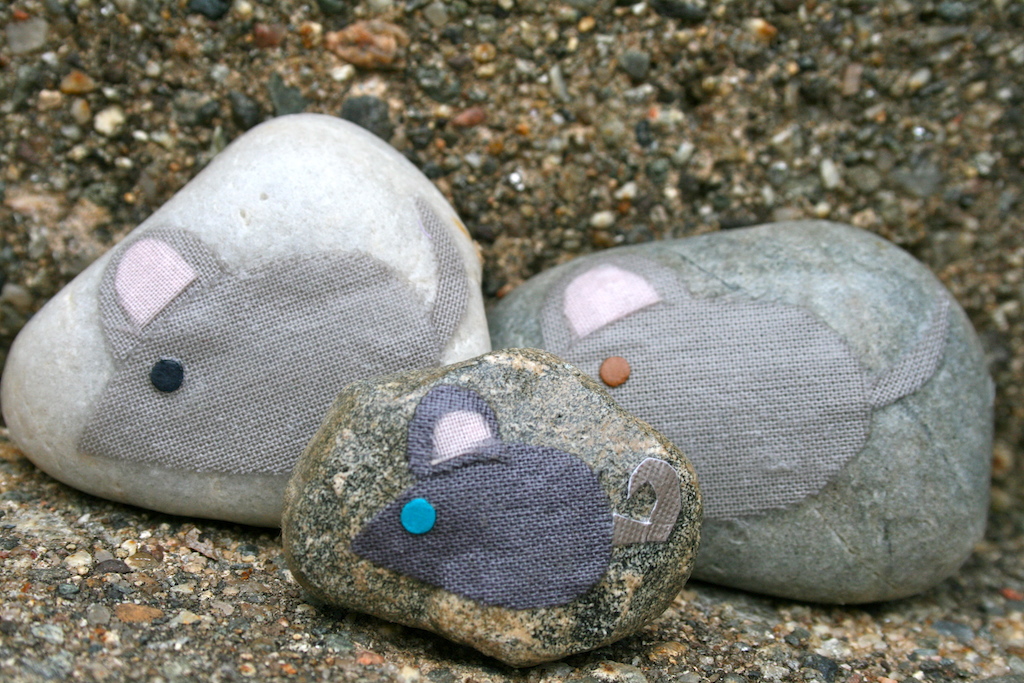
 Step 5: Use a hole punch with a super small hole to punch out a little eye and glue it on the mouse. Then, cut out a tail and glue that on as well. Be sure that the entire mouse has a layer of Mod Podge over it.
Step 6: Let the mouse dry.
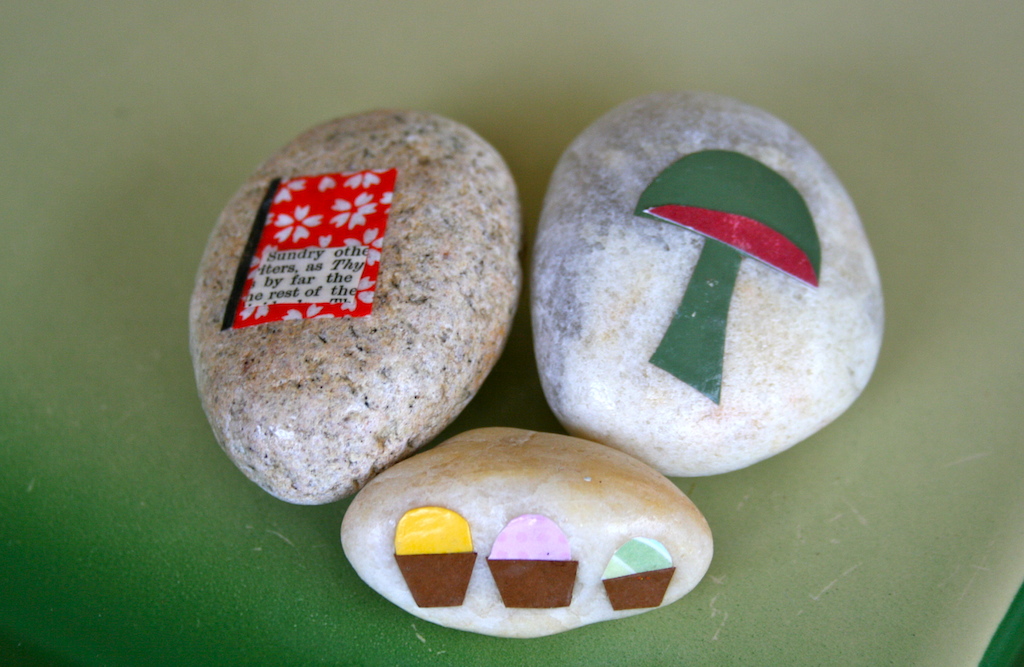
Step 7: Make some mouse friends, food, and play things for your new friend.
xo e


Very cute! As non-boyish as Eli is, I can only picture him throwing these across the living room. I much prefer thinking about your little ones creating an entire mouse soap opera, complete with snacks.
wow, emily, this is just so lovely. i love everything about it. and that kite! sigh.
I have got to get my hands on some Modge Podge! Those rocks are just too adorable! I also have two girls that I could certainly describe as “feisty”. I wonder what they’d choose as main characters!
Very inspiring…off to collect rocks…
Oh, I love this idea! My six year old daughter is going to love this. Thank-you for sharing your creativity!
That is so adorable!! THanks for sharing! Found you via Crafty Crow.
These are adorable!!! What a great idea! Found you via crafty crow too.
Thanks for the story stone enthusiasm! It makes me want to make more and more.
This is such a great project! What a fun (and cheap) way to be creative and spend quality time together!
I have a 6 year old girl who will LOVE making stone stories. Thanks for the great tutorial.
This is a great idea, thanks for the tutorial! Do you mind if I put a link to it on my blog?
Hi Cat – Please feel free to link to this tutorial on your blog. 🙂 E
these are adorable! found you through Crafty
Crow
I love these and so will my 5yo! Great weekend project -thanks for sharing.
Will be linking on my blog when done.
i love this idea… i plan to link back here and add this to my fav finds on friday on my blog!
Will link to this from my blog …such a fantastic idea, thank you so much for sharing!
we are going to be camping at Lake Superior next weekend-the lovely round stones found on the beaches there would be PERFECT for this. thank you for the inspiration
Oh I love this!! I’m sure my kids will, too, but I don’t even care if they wouldn’t, because it is so stinkin’ cute!! Thank you! (also found you via the CC)
So clever! My girls will love doing this! Thanks for sharing!
lisa
These are wonderful!!!! I am so excited to make some of my own!
So cute! I linked to you 🙂
I simply LOVE this, I’m going to make some now. I think I will paint though. Will let you know how it goes
My kids would love this! A question – what is mod podge?
Hi Justine –
Mod Podge is made by the company Plaid. It is a decoupage medium that is often found at craft stores.
I’m so glad to hear you like my project!
Have fun.
Emily
This is the best idea! I adore it! I am posting about it on my blog and how I adapted your idea for my fast paced life. I linked to you not only because I want people to see the real deal but also you sell them so reasonable – I want to buy them!
Thank you for sharing this rich idea!
Very cute craft! Can’t wait till my daughter gets home so we can go rock hunting!
holy smokes… i am completely in love with these! i can’t wait to get home and make them! a little bowl of them on the shelf and my son would be busy for HOURS!!! a.dor.a.ble!!!
Thank you! Your enthusiasm and kind words mean so much. Truly!
YES!
This craft is amazing…I know its a little late, but I posted about it on Craft Gossip…it was found via Pinterest.
http://lessonplans.craftgossip.com/?p=5048
Thanks!
Kristen
Is this ok to pin? http://pinterest.com/pin/108508672241513693/
Just stopping by to let you know that I’ve featured your craft on Family Fun Crafts! You can see it here:
http://funfamilycrafts.com/story-stones/
If you have other kid friendly crafts, I’d love it if you would submit them. 🙂 If you would like to display a
featured button on your site, you can grab one from the right side bar of your post above.
i likey a lottey….got to make…got to make……..xxxxx
Oh my goodness, this is a fabulous idea!! We go to Lake Michigan every year and every year I bring back buckets of rocks hoping to find something to do with them–I’ve found it!! I CAN’T wait to get started!!! Thanks for sharing this!!!
I hope you came home with buckets filled with stones! Happy Story Stone making! E
I saw your idea on another blog, Fairy Dust Teaching. I can’t wait to make some to use in my classroom. Like the previous responder, I am going to Lake Michigan next week! Yay!
Wonderful! I hope you find some beautiful, smooth rocks at Lake Michigan! They are really useful for classroom use! E
These are so lovely, thank-you fro sharing!
The fabric looks really effective. Another idea to add to my list. Thank you!
You might be interested on my take of story stones – Waldorf inspired story coins: http://www.hinterlandmama.com/2013/01/ts-birthday-crystal-gnome-story-wooden.html
love this cant wait to share it with others