
 I’ve been spending some of my evening time developing new story stones that belong to different groups and series. I’ve already posted about the fairy tale series, which has made me beyond happy and, at the same time, feeling sort of creepy since most of the old fashioned fairy tales are mostly about being eaten and other random, gruesome deaths. These days, I’m particularly excited about the new back-to-school series that features a diverse group of children with different hair colors, clothing styles, and skin colors. The series isn’t meant to be limited to children who go to traditional schools; instead, it is meant to celebrate the reacquainting of a group of children who have been apart during the long, warm, free-roaming summer. Stay tuned for pictures of those new story stone children and play things in the coming weeks.
On top of developing the actual stones, I’ve been pondering various settings and play areas for the stones. Lots of ideas have been flooding my mind, but, just yesterday, while dealing with a jar of pickles, I came up with one of my favorites so far: The Story Telling Jar.
It is made with a clean, transparent jar, some felt, stuffing, a needle and thread, a button, a little bit of glue (optional), and a wee bit of fabric scraps and paper. It is the kind of project that can be tailored to whatever imaginative story you and/or your child hold dear.
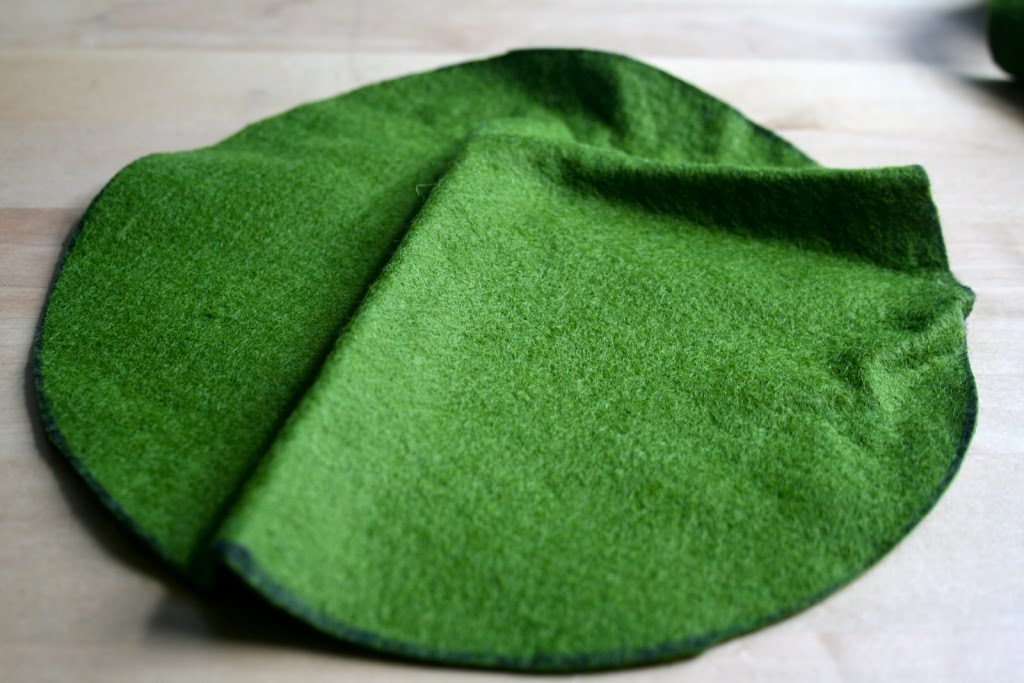
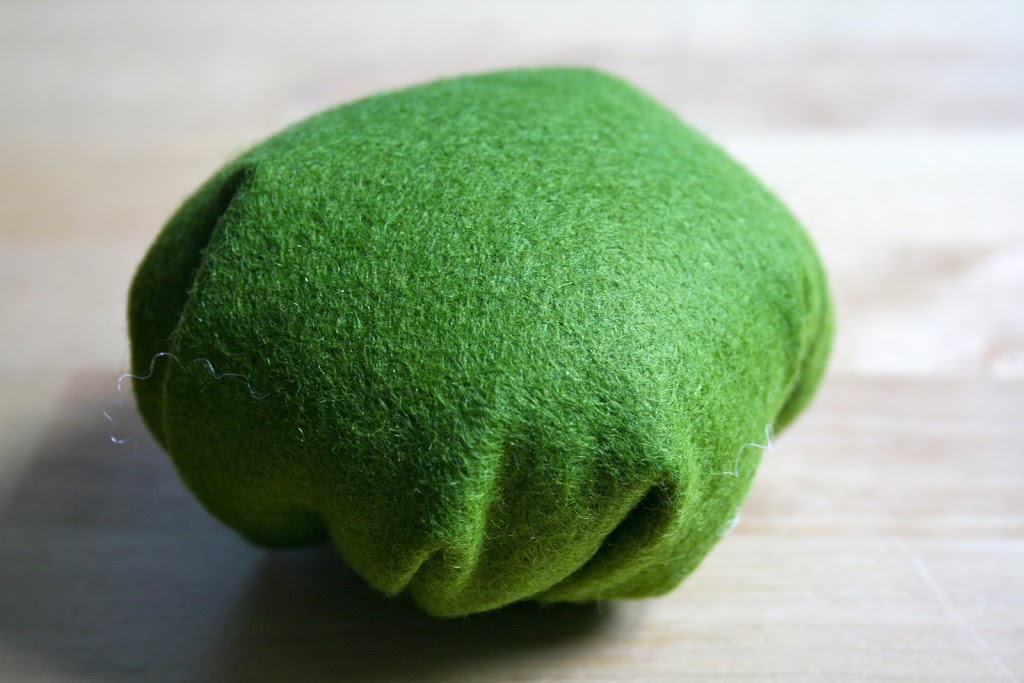
1. It begins with a large felt circle and a basting stitch around the circle. I filled it with stuffing, pulled it tight, and knotted. This is the grassy hill that goes in the bottom of the jar.
 2. Before putting the grassy hill in, I placed a circle of green felt at the bottom to sort of fill in the areas where light filtered through the bottom. I used a dot of glue under the circle of felt to be sure it stayed in place, but the glue is optional since the felt gets wedged in there.
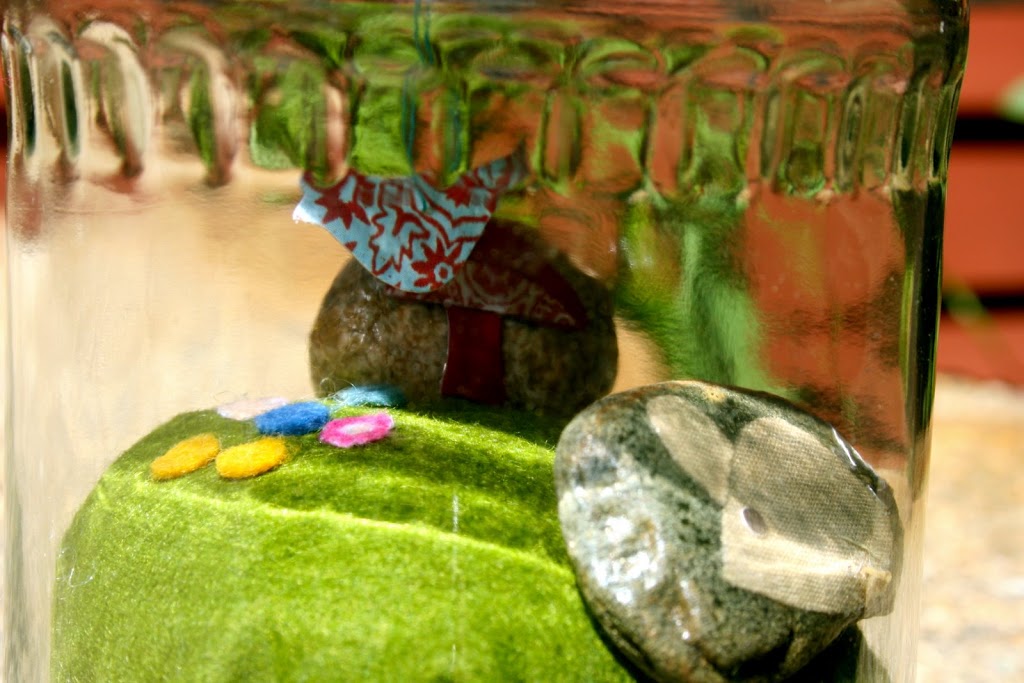
3. Once the hill was in place, I used a hole punch to make some fabric and felt circles. Using tiny, tiny dabs of glue, I glued the little flowers on place on the hill. I think the the hill can be adorned any which way.
4. There is a bird flying around in the jar. Do you see it? It is a tiny paper bird dangling on some blue thread. I punched a hole in the lid of the jar, threaded the bird thread through the lid’s hole, and tied the end to a button to keep it from falling through.
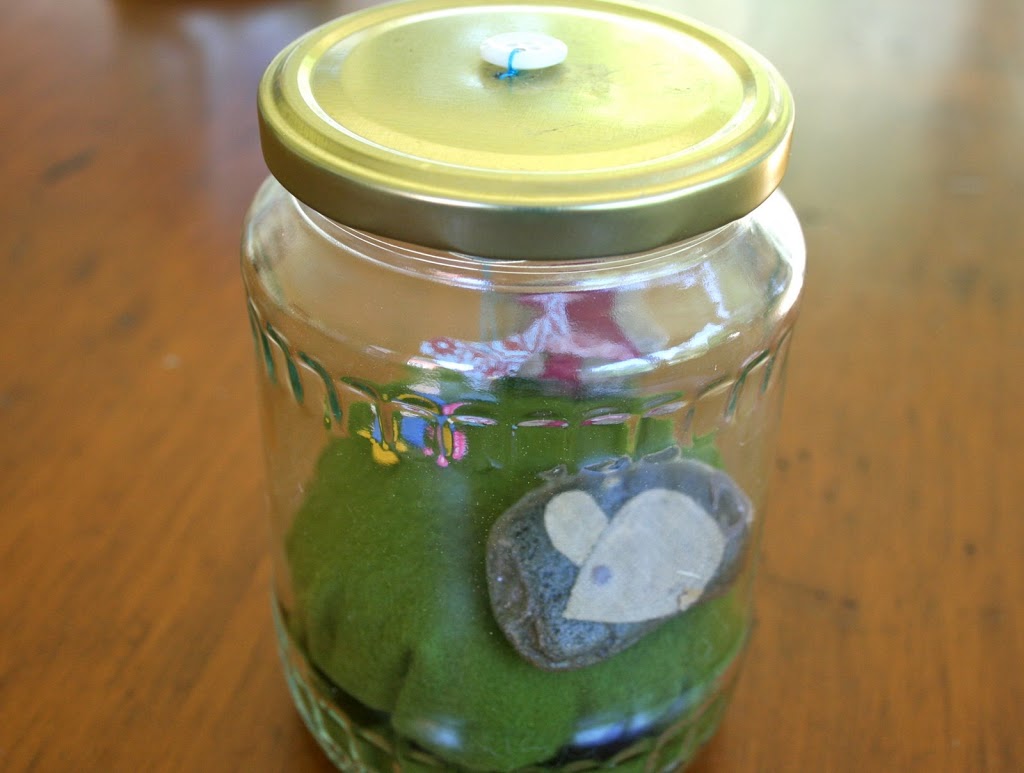 5. Put some story stones (or any small critters or people) inside the jar. Fun.
xo e


I just came across your blog, and I have to say that I love the Story Stones! What a great idea! Would it be okay if I blogged about them (and used your pictures) on my blog?
patternimpossible.blogspot.com
Aww, I love this idea! What a magical little jar…so many fun possibilities. Thanks so much for all the activity inspiration, I’ll be linking.
I do so love your ideas! Another gorgeous one to try with my little ones.