
 The sun is shining, birds are singing, and as is always the case in March, I have a deep desire to bring spring inside my dusty, still-too-cold house. The problem is that it is slim pickings outside my New England front door. On an after dinner walk yesterday, Chick collected some stones, a rusty bolt, and some dried grass as her “finding spring” bouquet. This isn’t quite what I had in mind for the center of the table. She did the best she could, and when we mounded it all together it definitely looked a little springy in that look-what-we-found-under-the-melted-snow-pile kind of way, but it didn’t fully satisfy my need for sprouts and tender greens.
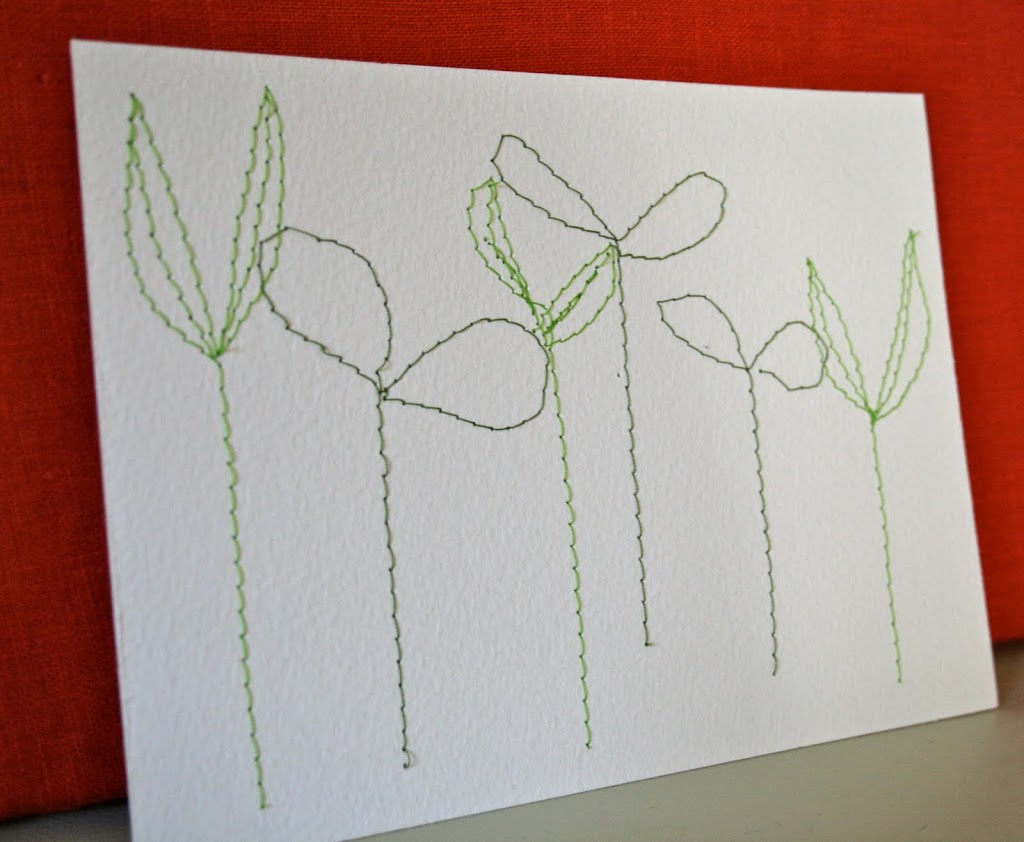
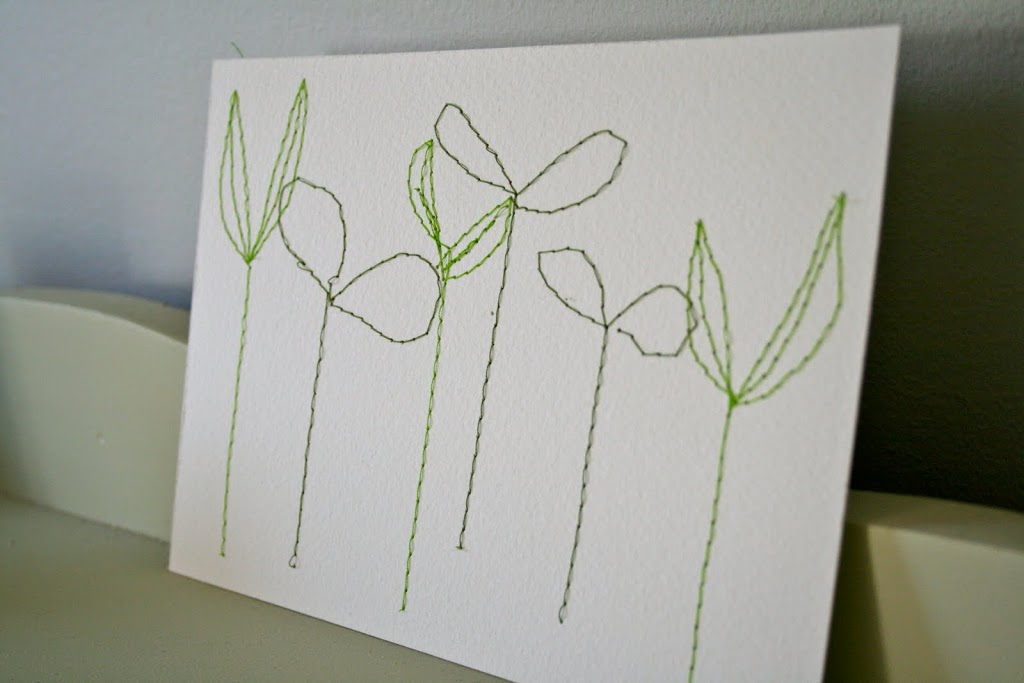
This afternoon I decided to make a little spring picture to hang in the kitchen. A bunch of people sent me enthusiastic comments and messages about my spring moleskines, which made me happy and inspired to continue the sewing through paper technique.
Materials:
your paper of choice ( I like the way it looks on thick watercolor paper)
thread
sewing machine
craft glue
scissors
How to:
1. Begin with a straight line for the stem, and slowly make a little sprout. When I wanted to “draw” a short line, I was sure to reverse stitch a bit to make sure the thread stays in place.
2. Once your sprout is finished snip the ends off of the threads on both sides of the paper. This is a picture of the back.
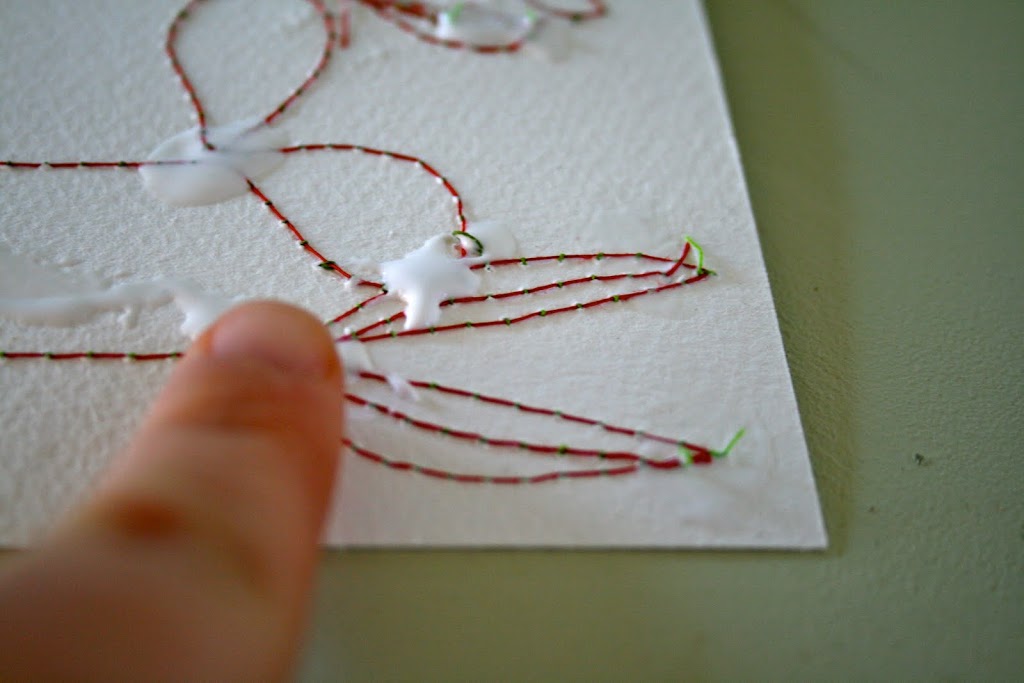
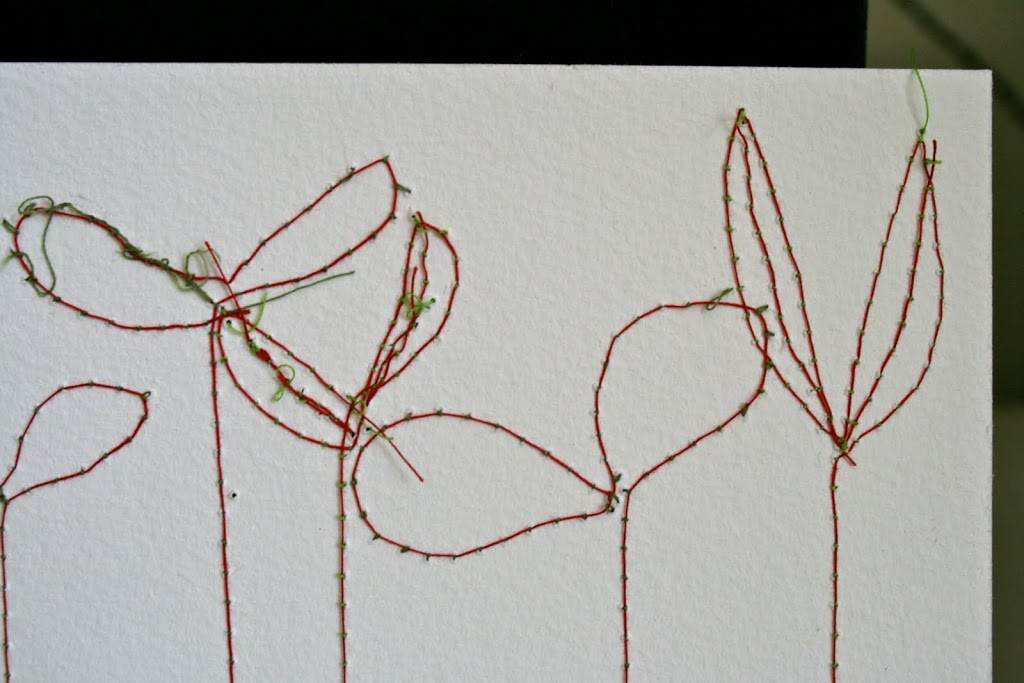 3. Make a field of sprouts. When you are finished, turn the paper over and put dots of craft glue (I used Tacky glue) on all of the places where there are loose threads and/or where you began or ended your stitched drawings. Use your finger to gently press the glue onto the thread.
 4. Once glue is dry you can frame it or just prop it against a wall.
Speaking of spring and sprouts, I have one last exciting little note. My sprout hook board was featured on Etsy’s front page this morning. I had no idea it was going to be there until I noticed that there was a little buzz in my inbox and Etsy shop. A huge thank you to whoever included it in such a beautiful sprout collection. I am truly honored!
xo e


Thanks for the tutorial! These would make really sweet notecards =)
love the sprouts and card! I was thinking how nice it would be to frame one and hang it on the wall! thanks for being so generous and sharing your tutorial!
Very cool, Emily! You are so humble about your artistic doings! I have to tell you that in my reading and writing support class, we are writing and making collages in our tiny moleskin notebooks. I’m off to Australia today, but when I get back I’m going to sew a design on each one. Happy spring to you. I hope the cold house warms up soon. It’s sure to with all the happy that radiates from YOU!
this is amazing – thank you!
oh, i am so in love with those sweet sprouts!
(if this posts as “Ben” it’s really me, the mama.)
This is so, so pretty! I just love it! I’ll be making one and linking to this as well. Thanks tons!
Hi Emily,
I really like this and decided to try it myself this weekend. I have a sewing machine and I have until now only used it for sewing on fabric. It worked fine on card but my main problem is the speed of the machine… It simply moves to fast for me to make a controlled sprout! 🙂 How did you do it? Do you have a machine with free hand facility?
Thanks in advance for your help.
Hi Karianne –
I used the hand wheel for most of it, and pressed the foot pedal very slowly for some parts. Hope this helps!
Good luck!